How to Make a Blog with Netlify - Fast & Free
November 20, 2019
Creating a website has become an easy task. Almost anyone can create and manage it using content management systems like WordPress, Drupal, Joomla or even browser-builder services like a SquareSpace or Wix. All these tools are powered by web servers, backend programming, and databases. Therefore, consuming all these resources can be expensive especially if you are just running a personal blog.
In this article, you will discover how to make a blog, that delivers better performance, higher security and lower budget, based on static site generators. Thanks to the concept of JAMStack
There are many ways to create websites with JAMStack. In this article, you will learn how to use a pre-built theme based on Netlify CMS and deploy your blog with a custom domain.
Why fast, secure, and low budget
- Fast: A static site does not require a server to load resources. Besides, almost all JAMStack themes are designed for high page speeds.
- Secure: less server interactions means less security issues.
- Low budget: Github is free, Netlify is free (in this case). You only pay for your domain name.
What is Netlify CMS
Like WordPress or any other CMS, Netlify CMS helps you manage your static website.
As mentioned on their website:
Netlify CMS is an open-source content management system for your Git workflow that enables you to provide editors with a friendly UI and intuitive workflows. You can use it with any static site generator to create faster, more flexible web projects.
Let’s dive in and make our Netlify blog.
Create a Netlify account
You can create a Netlify account with your email address, or you can signup directly with your Github account.
GitHub or any other git services is like a directory that contains the site’s files, any changes in that directory/repository will be automatically tracked and deployed by Netlify.
If you signup with your Github you should set a password later to log in your blog with Netlify identity. If you want to connect your Github account, click on your profile thumbnail, top right corner, then click settings and scroll down to Connected accounts section and choose Github.
Select a theme
Go to Netlify CMS templates library, choose a theme and click Deploy to Netlify, you will be then redirected to a window when you have to connect to your Github account, chose repository name, then click Save & deploy.
Then you will be redirected to the site overview panel, wait until your random URL is generated and attributed to your blog, then click on it to see your first preview of the blog!
Edit your domain name
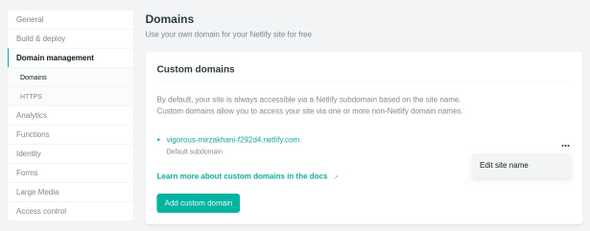
To edit your domain name, go to your site’s Settings › Domain Management section and click on Edit site name, under the three dots, to change subdomain.
Netlify gives you the possibility to add your domain name with free lifetime SSL. If you don’t have a domain you can buy one from NameCheap.
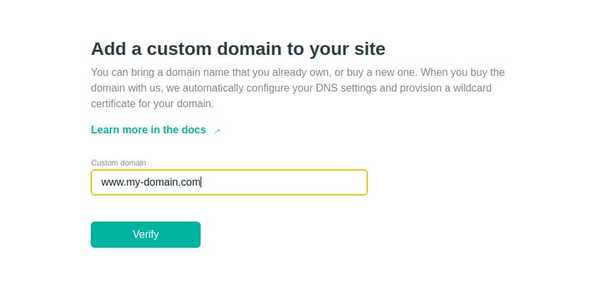
To add your domain click on Add custom domain, and enter your domain name. Click Verify to validate your ownership.
Configure DNS
Use a DNS provider that supports CNAME flattening, ANAME, or ALIAS records for root domains and alias your root domain to [your-site-name].netlify.com
Create an A record pointing your root domain to Netlify load balancer’s IP address 104.198.14.52
Manage your content
First, you must confirm the use of your Netlify identity to log in to your blog. Open the confirmation email and click on Accept invite.
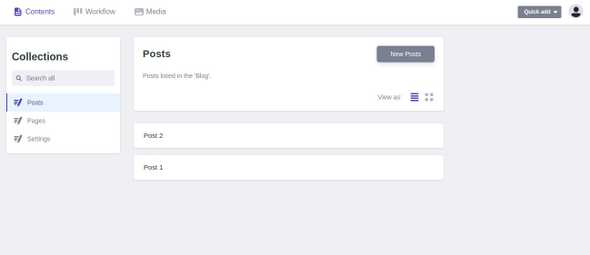
Then go to Netlify CMS dashboard, via the admin link your-domaine.com/admin, insert your credentials and login.
The content that needs to be managed on your site depends on the theme selected at the very beginning.
Conclusion
This way of doing websites is still young, even if it lacks support and theme creators, but it is very promising.
This does not mean that technologies such as WordPress are obsolete, they also offer high security and high page speed, but in most cases, it can be very expensive to achieve this level of performance.
If you’re a developer, I highly recommend you learn more about JAMStack and disrupt the new era of Web development.


